
Springboot快速入门
第一章.Springboot基本介绍
Spring Boot倡导约定优于配置,将简化开发发挥到极致。使用Spring Boot框架可以快速构建Spring应用,再也不需要大量的繁琐的的各种配置。Spring Boot框架设计的目标是:程序员关注业务逻辑就行了,环境方面的事儿交给Spring Boot就行。
Spring Boot特性:
- 快速创建独立的Spring应用程序。(Spring支持的SpringBoot都支持,也就是说SpringBoot全方位支持IoC,AOP等)
- 嵌入式的Tomcat、Jetty、Undertow容器。(web服务器本身就是几个jar包,Spring Boot框架自动嵌入了。)
- 需要什么功能时只需要引入对应的starter启动器即可。(启动器可以自动管理这个功能相关的依赖,自动管理依赖版本的控制)
- 尽最大努力,最大可能的自动配置Spring应用和第三方库。(例如:如果要进行事务的控制,不用做任何事务相关的配置,只需要在service类上添加@Transactional注解即可。)
- 没有代码生成,没有XML配置。(Spring Boot的应用程序在启动后不会动态地创建新的Java类,所有逻辑都是在编译期就已经确定好的)
- 提供了生产监控的支持,例如健康检查,度量信息,跟踪信息,审计信息等。也支持集成外部监控系统。
Spring Boot的开箱即用和约定优于配置:
- 开箱即用:Spring Boot框架设计得非常便捷,开发者能够在几乎不需要任何复杂的配置的情况下,快速搭建并运行一个功能完备的Spring应用。
- 约定优于配置:“约定优于配置”(Convention Over Configuration, CoC)是一种软件设计哲学,核心思想是通过提供一组合理的默认行为来减少配置的数量,从而简化开发流程。例如:Spring Boot默认约定了使用某个事务管理器,在事务方面不需要做任何配置,只需要在对应代码的位置上使用
@Transactional注解即可。
Starter-启动器
在 Spring Boot 中,启动器(Starter)本质上是一个简化依赖管理的概念。
Spring Boot 的启动器本质上就是一组预定义的依赖集合,它们被组织成一个个 Maven的依赖,以方便开发者快速集成特定的功能模块。
如果你想做web开发,只需要引入web启动器。web启动器会自动引入web开发所需要的子依赖。
- 依赖聚合:
每个启动器通常对应一个特定的功能集或者一个完整的应用模块,如spring-boot-starter-web就包含了构建 Web 应用所需的所有基本依赖项,如 Spring MVC, Tomcat 嵌入式容器等。 - 依赖传递:
当你在项目中引入一个启动器时,它不仅会把自身作为依赖加入到你的项目中,还会把它的所有直接依赖项(transitive dependencies)也加入进来。这意味着你不需要单独声明这些依赖项,它们会自动成为项目的一部分。 - 版本管理:
启动器内部已经指定了所有依赖项的具体版本,这些版本信息存储在一个公共的 BOM(Bill of Materials,物料清单)文件中,通常是spring-boot-dependencies。当引入启动器时,实际上也间接引用了这个 BOM,从而确保了所有依赖项版本的一致性。 - 自动配置:
许多启动器还提供了自动配置(Auto-configuration),这是一种机制,允许 Spring Boot 根据类路径上的可用组件自动设置你的应用程序。例如,如果类路径上有 Spring MVC 和嵌入式 Tomcat,则 Spring Boot 会自动配置它们,并准备好一个 web 应用程序。
官方启动器命名特点:spring-boot-starter-*
非官方启动器命名特点:*-spring-boot-starter
Spring Boot核心注解
@SpringBootApplication注解
Spring Boot的主入口程序被@SpringBootApplication注解标注,可见这个注解的重要性,查看它的源码:
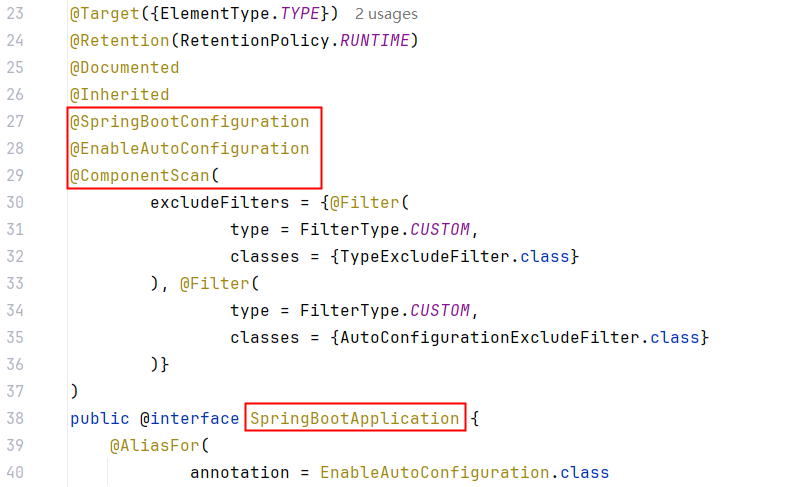
可以看出这个注解属于组合注解。拥有@SpringBootConfiguration、@EnableAutoConfiguration、@ComponentScan的功能。
@SpringBootConfiguration注解
@SpringBootConfiguration注解的源码如下:
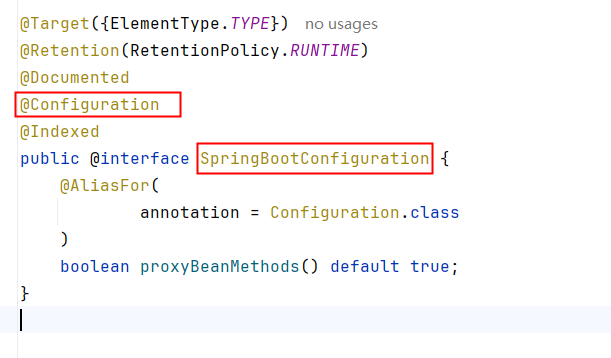
可以看到这个注解的被@Configuration标注,说明主入口程序是一个配置类。也就是说主入口中的方法可以被@Bean注解标注,被@Bean注解的标注的方法会被Spring容器自动调用,并且将该方法的返回对象纳入IoC容器的管理。测试一下:
@SpringBootApplication
public class Sb305CoreApplication {
    @Bean
    public Date getNowDate(){ // 方法名作为bean的id
        return new Date();
    }
    public static void main(String[] args) {
        ConfigurableApplicationContext applicationContext = SpringApplication.run(Sb305CoreApplication.class, args);
        Date dateBean1 = applicationContext.getBean(Date.class);
        System.out.println(dateBean1);
        Date dateBean2 = applicationContext.getBean("getNowDate", Date.class);
        System.out.println(dateBean2);
    }
}
执行结果:
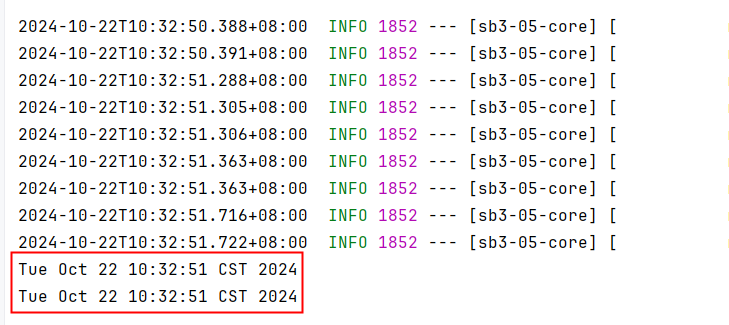
通过测试我们也认证了这一点:SpringBoot主入口类实际上就是一个配置类。
这个配置类也可以称为源,起源的意思,SpringBoot从这个配置类开始加载项目中所有的bean。
@EnableAutoConfiguration注解
该注解表示启用自动配置。
Spring Boot 会根据你引入的依赖自动为你配置好一系列的 Bean,无需手动编写复杂的配置代码。
例如:如果你在SpringBoot项目中进行了如下配置:
spring.datasource.driver-class-name=com.mysql.cj.jdbc.Driver
spring.datasource.url=jdbc:mysql://localhost:3306/springboot
spring.datasource.username=root
spring.datasource.password=123456并且在依赖中引入了mybatis依赖/mybatis启动器,那么SpringBoot框架将为你自动化配置以下bean:
- SqlSessionFactory: MyBatis的核心工厂SqlSessionFactory会被自动配置。这个工厂负责创建SqlSession实例,后者用来执行映射文件中的SQL语句。
- TransactionManager: DataSourceTransactionManager会被自动配置来管理与数据源相关的事务。
@ComponentScan注解
这个注解的作用是:启动组件扫描功能,代替spring框架xml文件中这个配置:
<context:component-scan base-package="com.powernode.sb305core"/>因此被@SpringBootApplication注解标注之后,会启动组件扫描功能,扫描的包是主入口程序所在包及子包,因此如果一个bean要纳入IoC容器的管理则必须放到主入口程序所在包及子包下。放到主入口程序所在包之外的话,扫描不到。测试一下:
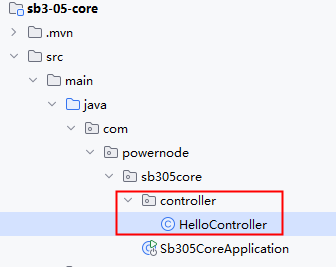
HelloController代码如下:
@RestController
public class HelloController {
    @GetMapping("/hello")
    public String hello(){
        return "hello world!";
    }
}
启动服务器测试:

要让bean纳入IoC容器的管理,必须将类放到主入口程序同级目录下,或者子目录下。
Spring Boot的单元测试
test-starter引入以及测试类编写
使用单元测试应该如何调用service对象上的方法呢?
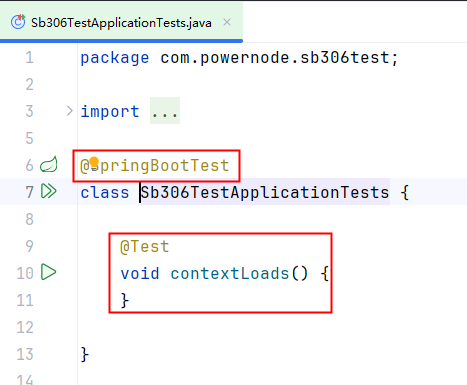
在使用脚手架创建Spring Boot项目时,为我们生成了单元测试类,如下:

当然,如果要使用单元测试,需要引入单元测试启动器,如果使用脚手架创建SpringBoot项目,这个test启动器会自动引入:
<dependency>
    <groupId>org.springframework.boot</groupId>
    <artifactId>spring-boot-starter-test</artifactId>
    <scope>test</scope>
</dependency>
@SpringBootTest注解
@SpringBootTest 会创建一个完整的 Spring 应用程序上下文(Application Context),这个上下文包含了应用程序的所有组件和服务。以下是 @SpringBootTest 做的一些主要工作:
创建 ApplicationContext:
@SpringBootTest使用SpringApplication的run()方法来启动一个 Spring Boot 应用程序上下文。这意味着它会加载应用程序的主配置类和其他相关的配置类。
加载配置文件:
- 它会查找并加载默认的配置文件,如
application.properties
- 它会查找并加载默认的配置文件,如
自动配置:
- 如果应用程序依赖于 Spring Boot 的自动配置特性,
@SpringBootTest会确保这些自动配置生效。这意味着它会根据可用的类和bean来自动配置一些组件,如数据库连接、消息队列等。
- 如果应用程序依赖于 Spring Boot 的自动配置特性,
注入依赖:
- 使用
@SpringBootTest创建的应用程序上下文允许你在测试类中使用@Autowired注入需要的 bean,就像在一个真实的 Spring Boot 应用程序中一样。
- 使用
总的来说,@SpringBootTest 为你的测试提供了尽可能接近实际运行时环境的条件,这对于验证应用程序的行为非常有用。
注入service并调用
@SpringBootTest
class Sb306TestApplicationTests {

    @Autowired
    private UserService userService;

    @Test
    void contextLoads() {
        userService.save();
    }

}
第二章 外部化配置
什么是外部化配置
外部化配置是指:将配置信息存储在应用程序代码之外的地方。这样配置信息可以独立于代码进行管理。这样方便了配置的修改,并且修改后不需要重新编译代码,也不需要重新部署项目。
外部化配置的方式
SpringBoot支持多种外部化配置方式,包括但不限于:
- properties文件
- YAML文件
外部化配置的优势
- 灵活性:配置文件可以独立于应用程序部署,这使得可以根据运行环境的不同来调整配置,而无需修改代码。
- 易于维护:配置变更不需要重新构建和部署应用程序,降低了维护成本。
- 安全性:敏感信息如数据库密码、API密钥等可以存储在外部,并且可以限制谁有权限访问这些配置信息。
- 共享性:多实例或多服务可以共享相同的配置信息,减少重复配置的工作量。
- 版本控制:配置文件可以存放在版本控制系统中,便于跟踪历史版本和回滚配置。
总之,外部化配置使得配置更加灵活、安全、易于管理和共享,是现代云原生应用中非常推荐的做法
application.properties
application.properties配置文件是SpringBoot框架默认的配置文件。
application.properties不是必须的,SpringBoot对于应用程序来说,都提供了一套默认配置(就是我们所说的自动配置)。
如果你要改变这些默认的行为,可以在application.properties文件中进行配置。
application.properties可以放在类路径当中,也可以放在项目之外。因此称为外部化配置。
Spring Boot 框架在启动时会尝试从以下位置加载 application.properties 配置文件:
file:./config/:首先在Spring Boot 当前工作目录下的
config文件夹中查找。- 注意:如果没有找到
**<font style="color:#DF2A3F;">application.properties</font>**会继续找**<font style="color:#DF2A3F;">application.yml</font>**,如果这两个都没有找到,才会进入以下位置查找,以此类推。
- 注意:如果没有找到
- file:./:如果在当前工作目录下
config目录中找不到时,再从当前工作目录中查找。 - classpath:/config/:如果从工作目录中找不到,会从类路径中找,先从类路径的
/config/目录下寻找配置文件。 - classpath:/:如果在
/config/下没有找到,它会在类路径的根目录下查找。
Spring Boot 会按照这个顺序来加载配置文件,如果在多个位置有相同的属性定义,那么最先检查的位置中的属性值将优先使用。
如果你想要指定其他的配置文件位置或者改变默认的行为,可以通过 --spring.config.location= 后跟路径的方式来指定配置文件的具体位置。例如 :
java -jar sb3-01-first-web-1.0-SNAPSHOT.jar --spring.config.location=file:///E:\a\b\application.properties这样,Spring Boot 将会首先从 E:\a\b\ 这个路径加载配置文件。注意,这种方式可以用来覆盖默认的配置文件位置,并且可以结合以上提到的位置一起使用。
注意:以上的--spring.config.location=file:///E:\a\b\application.properties就属于命令行参数,它将来会被传递到main方法的(String[] args)参数上。
使用@Value注解
@Value注解可以将application.properties/application.yml文件中的配置信息注入/绑定到java对象的属性上。
语法格式:@Value("${key}")
使用脚手架创建SpringBoot项目,不添加任何启动器:
在resources/application.properties文件中进行如下配置:
myapp.username=jack
myapp.email=jack@123.com
myapp.age=30
编写service类:
@Service("userService")
public class UserService {
@Value("${myapp.username}")
private String username;
@Value("${myapp.email}")
private String email;
@Value("${myapp.age}")
private Integer age;
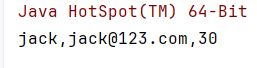
public void printInfo(){
String str = String.join(",", username, email, String.valueOf(age));
System.out.println(str);
}
}编写单元测试:
@SpringBootTest
class Sb307ExternalConfigApplicationTests {
    @Autowired
    private UserService userService;
    @Test
    void test01() {
        userService.printInfo();
    }
}
运行结果:
使用@Value注解时也可以指定默认值,当指定默认值时,如果配置文件中没有指定配置值,则采用默认值。
语法格式:@Value("${key:defalut}")
@Service("userService")
public class UserService {

    @Value("${myapp.username}")
    private String username;

    @Value("${myapp.email}")
    private String email;

    @Value("${myapp.age}")
    private Integer age;

    @Value("${myapp.password:123456}")
    private String password;

    public void printInfo(){
        String str = String.join(",", username, email, String.valueOf(age), password);
        System.out.println(str);
    }
}
执行结果:

YAML
YAML概述
SpringBoot采用集中式配置管理,所有的配置都编写到一个配置文件中:application.properties
如果配置非常多,层级不够分明,因此SpringBoot为了提高配置文件可读性,也支持YAML格式的配置文件:application.yml
YAML(YAML Ain't Markup Language)是一种人类可读的数据序列化格式,它通常用于配置文件,在各种编程语言中作为一种存储或传输数据的方式。YAML的设计目标是易于阅读和编写,同时保持足够的表达能力来表示复杂的数据结构。
YAML文件的扩展名可以是**<font style="color:#DF2A3F;">.yaml</font>**或**<font style="color:#DF2A3F;">.yml</font>**。
常见的数据存储和交换格式
properties、XML、JSON、YAML这几种格式确实是用来存储和交换数据的常见方式,但它们各有特点和适用场景:
Properties
- 这种格式主要用于Java应用程序中的配置文件。它是键值对的形式,每一行是一个键值对,使用等号或冒号分隔键和值。
- 特点是简单易懂,但在处理复杂结构的数据时显得力不从心。
XML (eXtensible Markup Language)
- XML是一种标记语言,用来描述数据的格式。它支持复杂的数据结构,包括嵌套和属性。
- XML文档具有良好的结构化特性,适合传输和存储结构化的数据。但是,XML文档通常体积较大,解析起来也比较耗资源。
JSON (JavaScript Object Notation)
- JSON是一种轻量级的数据交换格式,易于人阅读和编写,同时也易于机器解析和生成。它基于JavaScript的一个子集,支持多种数据类型,如数字、字符串、布尔值、数组和对象。
- JSON因为简洁和高效而广泛应用于Web应用程序之间进行数据交换。
YAML (YAML Ain't Markup Language)
- YAML设计的目标之一就是让人类更容易阅读。它支持类似JSON的数据序列化,但提供了更多的灵活性,例如缩进来表示数据结构。
- YAML非常适合用来编写配置文件,因为它允许以一种自然的方式组织数据,并且可以包含注释和其他人类可读的元素。
总结来说,这四种格式都可以用来存储和交换数据,但它们的设计初衷和最佳使用场景有所不同。选择哪种格式取决于具体的应用需求、数据复杂度、性能要求等因素。
YAML的语法规则
YAML的语法规则如下:
数据结构:YAML支持多种数据类型,包括:
- 字符串、数字、布尔值
- 数组、list集合
- map键值对 等。
YAML使用
一个空格来分隔属性名和属性值,例如:properties文件中这样的配置:name=jackyaml文件中需要这样配置:name: jack
YAML用
换行+空格来表示层级关系。注意不能使用tab,必须是空格,空格数量无要求,大部分建议2个或4个空格。例如:properties文件中这样的配置:myapp.name=mallyaml文件中就需要这样配置:
myapp:
  name: mall
同级元素左对齐。例如:
properties文件中有这样的配置:
myapp.name=mall
myapp.count=10
2. `yaml`文件中就应该这样配置:
myapp:
  name: mall
count: 10- 键必须是唯一的:在一个映射中,键必须是唯一的。
- 注释:使用
#进行注释。 - 大小写敏感
YAML的使用小细节
第一:普通文本也可以使用单引号或双引号括起来:(当然普通文本也可以不使用单引号和双引号括起来。)
- 单引号括起来:单引号内所有的内容都被当做普通文本,不转义(例如字符串中有\n,则\n被当做普通的字符串)
- 双引号括起来:双引号中有 \n 则会被转义为换行符
第二:保留文本格式
- | 将文本写到这个符号的下层,会自动保留格式。
第三:文档切割
- --- 这个符号下面的配置可以认为是一个独立的yaml文件。便于庞大文件的阅读。
Spring Boot框架同时支持properties和yaml。
强调:在同一个目录下同时存在application.properties和application.yml时,SpringBoot优先解析application.properties<font 文件。
配置文件合并
一个项目中所有的配置全部编写到application.properties文件中,会导致配置臃肿,不易维护,有时我们会将配置编写到不同的文件中,例如:application-mysql.properties专门配置mysql的信息,application-redis.properties专门配置redis的信息,最终将两个配置文件合并到一个配置文件中。
properties文件
application-mysql.properties
spring.datasource.username=root
spring.datasource.password=123456
application-redis.properties
spring.data.redis.host=localhost
spring.data.redis.port=6379
application.properties
spring.config.import=classpath:application-mysql.properties,classpath:application-redis.propertiesyaml文件
application-mysql.yml
spring:
  datasource:
    username: root
    password: 789789
application-redis.yml
spring:
  data:
    redis:
      host: localhost
      port: 6379
application.yml
spring:
  config:
    import:
      - classpath:application-mysql.yml
      - classpath:application-redis.yml
多环境切换
在Spring Boot中,多环境切换是指在一个应用程序中支持多种运行环境配置的能力。这通常用于区分开发(development)、测试(testing)、预生产(staging)和生产(production)等不同阶段的环境。
这种功能使得开发者能够在不同的环境中使用不同的配置,比如数据库连接信息、服务器端口、环境变量等,而不需要更改代码。这对于维护一个可移植且易于管理的应用程序非常重要。
- 开发环境的配置文件名一般叫做:
application-dev.properties
spring.datasource.username=dev
spring.datasource.password=dev123
spring.datasource.url=jdbc:mysql://localhost:3306/dev- 测试环境的配置文件名一般叫做:
application-test.properties
spring.datasource.username=test
spring.datasource.password=test123
spring.datasource.url=jdbc:mysql://localhost:3306/test- 预生产环境的配置文件名一般叫做:
application-preprod.properties
spring.datasource.username=preprod
spring.datasource.password=preprod123
spring.datasource.url=jdbc:mysql://localhost:3306/preprod- 生产环境的配置文件名一般叫做:
application-prod.properties
spring.datasource.username=prod
spring.datasource.password=prod123
spring.datasource.url=jdbc:mysql://localhost:3306/prod
如果你希望该项目使用生产环境的配置,你可以这样做:
- 第一种方式:在
application.properties文件中添加这个配置:spring.profiles.active=prod - 第二种方式:在命令行参数上添加:--spring.profiles.active=prod
将配置绑定到bean
绑定简单bean
SpringBoot配置文件中的信息除了可以使用@Value注解读取之外,也可以将配置信息一次性赋值给Bean对象的属性。
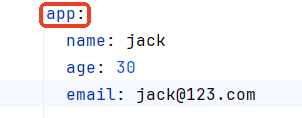
例如有这样的配置:
application.yml
app:
  name: jack
  age: 30
  email: jack@123.com
Bean需要这样定义:
package com.powernode.sb307externalconfig.bean;

import org.springframework.boot.context.properties.ConfigurationProperties;
import org.springframework.stereotype.Component;

@Component
@ConfigurationProperties(prefix = "app")
public class AppBean {
    private String name;
    private Integer age;
    private String email;

    @Override
    public String toString() {
        return "AppBean{" +
                "name='" + name + '\'' +
                ", age=" + age +
                ", email='" + email + '\'' +
                '}';
    }

    public String getName() {
        return name;
    }

    public void setName(String name) {
        this.name = name;
    }

    public Integer getAge() {
        return age;
    }

    public void setAge(Integer age) {
        this.age = age;
    }

    public String getEmail() {
        return email;
    }

    public void setEmail(String email) {
        this.email = email;
    }
}
说明:
- 被绑定的bean,需要使用
@ConfigurationProperties(prefix = "app")注解进行标注,prefix用来指定前缀,哪个是前缀,如下图所示:
配置文件中的name、age、email要和bean对象的属性名name、age、email对应上。(属性名相同)
并且bean中的所有属性都提供了setter方法。因为底层是通过setter方法给bean属性赋值的。
- 这样的bean需要使用
@Component注解进行标注,纳入IoC容器的管理。@Component注解负责创建Bean对象,@ConfigurationProperties(prefix = "app")注解负责给bean对象的属性赋值。 - bean的属性需要是
非static的属性。
编写测试程序,将bean对象输出,结果如下:

@Configuration注解
以上操作中使用了@Component注解进行了标注,来纳入IoC容器的管理。也可以使用另外一个注解@Configuration,用这个注解将Bean标注为配置类。多数情况下我们会选择使用这个注解,因为该Bean对象的属性对应的就是配置文件中的配置信息,因此这个Bean我们也可以将其看做是一个配置类。
@Configuration
@ConfigurationProperties(prefix = "app")
public class AppBean {
    private String name;
    private Integer age;
    private String email;
    //setter and getter
}
运行测试程序:

我们把这个Bean对象的类名打印一下看看:

可以发现底层实际上创建了AppBean的代理对象AppBean$$SpringCGLIB。
生成代理对象会影响效率,这里我们不需要使用代理功能,可以通过以下配置来取消代理机制:
@Configuration(proxyBeanMethods = false)
@ConfigurationProperties(prefix = "app")
public class AppBean {
    private String name;
    private Integer age;
    private String email;
    //setter and getter
}
执行结果如下:

绑定嵌套bean
当一个Bean中嵌套了一个Bean,这种情况下可以将配置信息绑定到该Bean上吗?当然可以。
有这样的一个配置:
app:
  name: jack
  age: 30
  email: jack@123.com
  address:
    city: BJ
    street: ChaoYang
    zipcode: 123456
需要编写这样的两个Bean:
package com.powernode.sb307externalconfig.bean;

import org.springframework.boot.context.properties.ConfigurationProperties;
import org.springframework.context.annotation.Configuration;

@Configuration(proxyBeanMethods = false)
@ConfigurationProperties(prefix = "app")
public class AppBean {
    private String name;
    private Integer age;
    private String email;
    private Address address;

    @Override
    public String toString() {
        return "AppBean{" +
                "name='" + name + '\'' +
                ", age=" + age +
                ", email='" + email + '\'' +
                ", address=" + address +
                '}';
    }

    public Address getAddress() {
        return address;
    }

    public void setAddress(Address address) {
        this.address = address;
    }

    public String getName() {
        return name;
    }

    public void setName(String name) {
        this.name = name;
    }

    public Integer getAge() {
        return age;
    }

    public void setAge(Integer age) {
        this.age = age;
    }

    public String getEmail() {
        return email;
    }

    public void setEmail(String email) {
        this.email = email;
    }
}
package com.powernode.sb307externalconfig.bean;

public class Address {
    private String city;
    private String street;
    private String zipcode;

    public String getCity() {
        return city;
    }

    public void setCity(String city) {
        this.city = city;
    }

    public String getStreet() {
        return street;
    }

    public void setStreet(String street) {
        this.street = street;
    }

    public String getZipcode() {
        return zipcode;
    }

    public void setZipcode(String zipcode) {
        this.zipcode = zipcode;
    }

    @Override
    public String toString() {
        return "Address{" +
                "city='" + city + '\'' +
                ", street='" + street + '\'' +
                ", zipcode='" + zipcode + '\'' +
                '}';
    }
}
执行测试程序,结果如下:

@EnableConfigurationProperties与@ConfigurationPropertiesScan
将AppBean纳入IoC容器的管理,之前我们说了两种方式:第一种是使用@Component,第二种是使用@Configuration。SpringBoot其实还提供了另外两种方式:
- 第一种:@EnableConfigurationProperties
- 第二种:@ConfigurationPropertiesScan
这两个注解都是标注在SpringBoot主入口程序上的:
@EnableConfigurationProperties(AppBean.class)
@SpringBootApplication
public class Sb307ExternalConfigApplication {
    public static void main(String[] args) {
        SpringApplication.run(Sb307ExternalConfigApplication.class, args);
    }
}
或者
@ConfigurationPropertiesScan(basePackages = "com.powernode.sb307externalconfig.bean")
@SpringBootApplication
public class Sb307ExternalConfigApplication {
    public static void main(String[] args) {
        SpringApplication.run(Sb307ExternalConfigApplication.class, args);
    }
}
运行测试程序,执行结果如下:

将配置赋值到Bean的Map/List/Array属性上
代码如下:
package com.powernode.sb307externalconfig.bean;

import org.springframework.boot.context.properties.ConfigurationProperties;

import java.util.Arrays;
import java.util.List;
import java.util.Map;

@ConfigurationProperties
public class CollectionConfig {
    private String[] names;
    private List<Product> products;
    private Map<String, Vip> vips;

    @Override
    public String toString() {
        return "CollectionConfig{" +
                "names=" + Arrays.toString(names) +
                ", products=" + products +
                ", vips=" + vips +
                '}';
    }

    public String[] getNames() {
        return names;
    }

    public void setNames(String[] names) {
        this.names = names;
    }

    public List<Product> getProducts() {
        return products;
    }

    public void setProducts(List<Product> products) {
        this.products = products;
    }

    public Map<String, Vip> getVips() {
        return vips;
    }

    public void setVips(Map<String, Vip> vips) {
        this.vips = vips;
    }
}

class Product {
    private String name;
    private Double price;

    @Override
    public String toString() {
        return "Product{" +
                "name='" + name + '\'' +
                ", price=" + price +
                '}';
    }

    public String getName() {
        return name;
    }

    public void setName(String name) {
        this.name = name;
    }

    public Double getPrice() {
        return price;
    }

    public void setPrice(Double price) {
        this.price = price;
    }
}

class Vip {
    private String name;
    private Integer age;

    @Override
    public String toString() {
        return "Vip{" +
                "name='" + name + '\'' +
                ", age=" + age +
                '}';
    }

    public String getName() {
        return name;
    }

    public void setName(String name) {
        this.name = name;
    }

    public Integer getAge() {
        return age;
    }

    public void setAge(Integer age) {
        this.age = age;
    }
}配置信息如下:application.yml
#数组
names:
  - jackson
  - lucy
  - lili

#List集合
products:
  - name: 西瓜
    price: 3.0
  - name: 苹果
    price: 2.0

#Map集合
vips:
  vip1:
    name: 张三
    age: 20
  vip2:
    name: 李四
age: 22提醒:记得入口程序使用@ConfigurationPropertiesScan(basePackages = "com.powernode.sb307externalconfig.bean")进行标注。
编写测试程序,执行结果如下:

将配置绑定到第三方对象
将配置文件中的信息绑定到某个Bean对象上,如果这个Bean对象没有源码,是第三方库提供的,怎么办?
此时可以单独编写一个方法,在方法上使用以下两个注解进行标注:
- @Bean
- @ConfigurationProperties
假设我们有这样一个类Address,代码如下:
package com.powernode.sb307externalconfig.bean;

public class Address {
    private String city;
    private String street;
    private String zipcode;

    public String getCity() {
        return city;
    }

    public void setCity(String city) {
        this.city = city;
    }

    public String getStreet() {
        return street;
    }

    public void setStreet(String street) {
        this.street = street;
    }

    public String getZipcode() {
        return zipcode;
    }

    public void setZipcode(String zipcode) {
        this.zipcode = zipcode;
    }

    @Override
    public String toString() {
        return "Address{" +
                "city='" + city + '\'' +
                ", street='" + street + '\'' +
                ", zipcode='" + zipcode + '\'' +
                '}';
    }
}
当然,我们是看不到这个源码的,只知道有这样一个字节码Address.class。大家也可以看到这个Address类上没有添加任何注解。假设我们要将以下配置绑定到这个Bean上应该怎么做?
address:
  city: TJ
  street: XiangYangLu
  zipcode: 11111111
实现代码如下:
@Configuration
public class ApplicationConfig {
    @Bean
    @ConfigurationProperties(prefix = "address")
    public Address getAddress(){
        return new Address();
    }
}
运行结果如下:

指定数据来源
之前所讲的内容是将Spring Boot框架默认的配置文件application.properties或application.yml作为数据的来源绑定到Bean上。如果配置信息没有在默认的配置文件中呢?可以使用@PropertySource注解指定配置文件的位置,这个配置文件可以是.properties,也可以是.xml。这里重点掌握.properties即可。
在resources目录下新建a目录,在a目录下新建b目录,b目录中新建group-info.properties文件,进行如下的配置:
group.name=IT
group.leader=LaoDu
group.count=20定义Java类Group,然后进行注解标注:
package com.powernode.sb307externalconfig.bean;

import org.springframework.boot.context.properties.ConfigurationProperties;
import org.springframework.context.annotation.Configuration;
import org.springframework.context.annotation.PropertySource;

@Configuration
@ConfigurationProperties(prefix = "group")
@PropertySource("classpath:a/b/group-info.properties")
public class Group {
    private String name;
    private String leader;
    private Integer count;

    @Override
    public String toString() {
        return "Group{" +
                "name='" + name + '\'' +
                ", leader='" + leader + '\'' +
                ", count=" + count +
                '}';
    }

    public String getName() {
        return name;
    }

    public void setName(String name) {
        this.name = name;
    }

    public String getLeader() {
        return leader;
    }

    public void setLeader(String leader) {
        this.leader = leader;
    }

    public Integer getCount() {
        return count;
    }

    public void setCount(Integer count) {
        this.count = count;
    }
}
以下三个注解分别起到什么作用:
- @Configuration:指定该类为配置类,纳入Spring容器的管理
- @ConfigurationProperties(prefix = "group"):将配置文件中的值赋值给Bean对象的属性
- @PropertySource("classpath:a/b/group-info.properties"):指定额外的配置文件
编写测试程序,测试结果如下:

@ImportResource注解
创建Bean的三种方式总结:
- 第一种方式:编写applicationContext.xml文件,在该文件中注册Bean,Spring容器启动时实例化配置文件中的Bean对象。
- 第二种方式:@Configuration注解结合@Bean注解。
- 第三种方式:@Component、@Service、@Controller、@Repository等注解。
第二种和第三种我们都已经知道了。针对第一种方式,如果在SpringBoot框架中应该怎么实现呢?使用@ImportResource注解实现
定义一个普通的Java类:Person
package com.powernode.sb307externalconfig.bean;

public class Person {
    private String name;
    private String age;

    @Override
    public String toString() {
        return "Person{" +
                "name='" + name + '\'' +
                ", age='" + age + '\'' +
                '}';
    }

    public String getName() {
        return name;
    }

    public void setName(String name) {
        this.name = name;
    }

    public String getAge() {
        return age;
    }

    public void setAge(String age) {
        this.age = age;
    }
}
在resources目录下新建applicationContext.xml配置文件:
<?xml version="1.0" encoding="UTF-8"?>
<beans xmlns="http://www.springframework.org/schema/beans"
xmlns:xsi="http://www.w3.org/2001/XMLSchema-instance"
xsi:schemaLocation="http://www.springframework.org/schema/beans http://www.springframework.org/schema/beans/spring-beans.xsd">
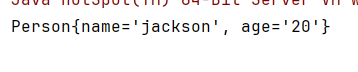
<bean id="person" class="com.powernode.sb307externalconfig.bean.Person">
<property name="name" value="jackson"/>
<property name="age" value="20"/>
</bean>
</beans>在SpringBoot主入口类上添加@ImportResource进行资源导入,这样applicationContext.xml文件中的Bean将会纳入IoC容器的管理:
@ImportResource("classpath:applicationContext.xml")
public class Sb307ExternalConfigApplication {}编写测试程序,看看是否可以获取到person这个bean对象:
@SpringBootTest
class Sb307ExternalConfigApplicationTests {
    @Autowired
    private Person person;
    @Test
    void test09(){
        System.out.println(person);
    }
}
执行结果如下:
因此,项目中如果有类似于Spring的这种xml配置文件,要想纳入IoC容器管理,需要在入口类上使用@ImportResource("classpath:applicationContext.xml")注解即可。
Environment
SpringBoot框架在启动的时候会将系统配置,环境信息全部封装到**<font style="color:#DF2A3F;">Environment</font>**对象中,如果要获取这些环境信息,可以调用**<font style="color:#DF2A3F;">Environment</font>**接口的方法。
在Spring Boot中,Environment接口提供了访问应用程序环境信息的方法,比如活动配置文件、系统环境变量、命令行参数等。Environment接口由Spring框架提供,Spring Boot应用程序通常会使用Spring提供的实现类AbstractEnvironment及其子类来实现具体的环境功能。
Environment对象封装的主要数据包括:
- Active Profiles: 当前激活的配置文件列表。Spring Boot允许应用程序定义不同的环境配置文件(如开发环境、测试环境和生产环境),通过激活不同的配置文件来改变应用程序的行为。
- System Properties: 系统属性,通常是操作系统级别的属性,比如操作系统名称、Java版本等。
- System Environment Variables: 系统环境变量,这些变量通常是由操作系统提供的,可以在启动应用程序时设置特定的值。
- Command Line Arguments: 应用程序启动时传递给主方法的命令行参数。
- Property Sources:
Environment还包含了一个PropertySource列表,这个列表包含了从不同来源加载的所有属性。PropertySource可以来自多种地方,比如配置文件、系统属性、环境变量等。
在Spring Boot中,可以通过注入Environment来获取上述信息。例如:
package com.powernode.springboot.bean;

import org.springframework.beans.factory.annotation.Autowired;
import org.springframework.core.env.Environment;
import org.springframework.stereotype.Component;

@Component
public class SomeBean {

    @Autowired
    private Environment environment;

    public void doSome(){
        // 直接使用这个环境对象,来获取环境信息,配置信息等。
        String[] activeProfiles = environment.getActiveProfiles();
        for (String activeProfile : activeProfiles) {
            System.out.println(activeProfile);
        }

        // 获取配置信息
        String street = environment.getProperty("app.xyz.addr.street");
        System.out.println(street);
    }
}
通过这种方式,你可以根据环境的不同灵活地配置你的应用程序。Environment是一个非常有用的工具,它可以帮助你管理各种类型的配置信息,并根据不同的运行时条件做出相应的调整。
Spring Boot中如何进行AOP的开发
Spring Boot AOP概述
面向切面编程AOP在Spring教程中已经进行了详细讲解,这里不再赘述,如果忘记的同学,可以重新听一下Spring教程中AOP相关的内容。这里仅带着大家在Spring Boot中实现AOP编程。
Spring Boot的AOP编程和Spring框架中AOP编程的唯一区别是:引入依赖的方式不同。其他内容完全一样。Spring Boot中AOP编程需要引入aop启动器:
<!--aop启动器-->
<dependency>
  <groupId>org.springframework.boot</groupId>
  <artifactId>spring-boot-starter-aop</artifactId>
</dependency>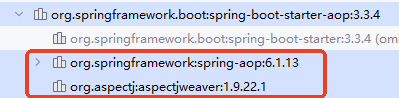
可以看到,当引入aop启动器之后,会引入aop依赖和aspectj依赖。
- aop依赖:如果只有这一个依赖,也可以实现AOP编程,这种方式表示使用了纯Spring AOP实现aop编程。
- aspectj依赖:一个独立的可以完成AOP编程的AOP框架,属于第三方的,不属于Spring框架。(我们通常用它,因为它的功能更加强大)
Spring Boot AOP实现
实现功能:项目中很多service,要求执行任何service中的任何方法之前记录日志。
创建Spring Boot项目引入aop启动器
项目名:sb3-08-aop
<!--aop启动器-->
<dependency>
  <groupId>org.springframework.boot</groupId>
  <artifactId>spring-boot-starter-aop</artifactId>
</dependency>
编写service并提供方法
package com.powernode.aop.service;

public interface OrderService {
    /**
     * 生成订单
     */
    void generate();

    /**
     * 订单详情
     */
    void detail();
}
package com.powernode.aop.service.impl;
import com.powernode.aop.service.OrderService;
import org.springframework.stereotype.Service;
@Service("orderService")
public class OrderServiceImpl implements OrderService {
@Override
public void generate(Integer id, String name) {
System.out.println("生成订单");
}
@Override
public void detail(Integer id) {
System.out.println("订单详情");
}
}
编写切面
package com.powernode.aop;

import org.aspectj.lang.JoinPoint;
import org.aspectj.lang.annotation.Aspect;
import org.aspectj.lang.annotation.Before;
import org.springframework.stereotype.Component;

import java.time.LocalDateTime;
import java.time.format.DateTimeFormatter;

@Component // 纳入IoC容器
@Aspect // 指定该类为切面类
public class LogAspect {

    // 日期格式化器
    private DateTimeFormatter formatter = DateTimeFormatter.ofPattern("yyyy-MM-dd HH:mm:ss SSS");

    // 前置通知
    // 切入点表达式:service包下任意类的任意方法
    @Before("execution(* com.powernode.aop.service..*.*(..))")
    public void sysLog(JoinPoint joinPoint) throws Throwable {
        StringBuilder log = new StringBuilder();
        LocalDateTime now = LocalDateTime.now();
        String strNow = formatter.format(now);
        // 追加日期
        log.append(strNow);
        // 追加冒号
        log.append(":");
        // 追加方法签名
        log.append(joinPoint.getSignature().getName());
        // 追加方法参数
        log.append("(");
        Object[] args = joinPoint.getArgs();
        for (int i = 0; i < args.length; i++) {
            log.append(args[i]);
            if(i < args.length - 1) {
                log.append(",");
            }
        }
        log.append(")");
        System.out.println(log);
    }
}
测试
package com.powernode.aop;
import com.powernode.aop.service.OrderService;
import org.junit.jupiter.api.Test;
import org.springframework.beans.factory.annotation.Autowired;
import org.springframework.boot.test.context.SpringBootTest;
@SpringBootTest
class Sb308AopApplicationTests {
@Autowired
private OrderService orderService;
@Test
void contextLoads() {
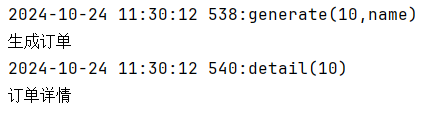
orderService.generate(10, "name");
orderService.detail(10);
}
}
执行结果如下:
第三章.整合持久层框架MyBatis
引入mysql驱动以及mybatis的启动器
依赖如下:
<!--mybatis的启动器-->
<dependency>
    <groupId>org.mybatis.spring.boot</groupId>
    <artifactId>mybatis-spring-boot-starter</artifactId>
    <version>3.0.3</version>
</dependency>
<!--mysql的驱动依赖-->
<dependency>
    <groupId>com.mysql</groupId>
    <artifactId>mysql-connector-j</artifactId>
    <scope>runtime</scope>
</dependency>
编写数据源配置
前面提到过,Spring Boot配置统一可以编写到application.properties中,配置如下:
# Spring Boot脚手架自动生成的
spring.application.name=sb3-05-springboot-mybatis

# mybatis连接数据库的数据源
spring.datasource.type=com.zaxxer.hikari.HikariDataSource
spring.datasource.driver-class-name=com.mysql.cj.jdbc.Driver
spring.datasource.url=jdbc:mysql://localhost:3306/springboot
spring.datasource.username=root
spring.datasource.password=123456
以上的配置属于连接池的配置,连接池使用的是Spring Boot默认的连接池:HikariCP
编写Mapper/dao/repository接口
创建repositoryMapper/dao包,在该包下新建UserMapper接口,代码如下:
@RestController
@RequestMapping("/users")
public class UserController {

    @Autowired
    private UserService userService;

    // 获取所有用户
    @GetMapping
    public List<User> getAllUsers() {
        return userService.GetAllUser();
    }

    // 根据ID获取用户
    @GetMapping("/{id}")
    public User getUserById(@PathVariable Long id) {
        return userService.getUserById(id).orElse(null);
    }

    // 创建用户
    @PostMapping
    public User createUser(@RequestBody User user) {
        return userService.createUser(user);
    }

    // 更新用户
    @PutMapping("/{id}")
    public User updateUser(@PathVariable Long id, @RequestBody User user) {
        return userService.updateUser(id, user).orElse(null);
    }

    // 删除用户
    @DeleteMapping("/{id}")
    public boolean deleteUser(@PathVariable Long id) {
        return userService.deleteUser(id);
    }

}
编写Mapper接口的XML配置文件
在resources目录下新建mapper目录,将来的mapper.xml配置文件放在这个目录下。
生成mapper.xml:
接下来就是编写SQL语句了,最终UserMapper.xml文件的配置如下:
<?xml version="1.0" encoding="UTF-8" ?>
<!DOCTYPE mapper PUBLIC "-//mybatis.org//DTD Mapper 3.0//EN" "http://mybatis.org/dtd/mybatis-3-mapper.dtd" >
<mapper namespace="com.cq.springboot_mybatis.mapper.UserMapper">
    <insert id="insert" parameterType="User">
        insert into user(name,email) values(#{name},#{email})
    </insert>
    <delete id="delete" parameterType="long">
        delete from user where id=#{id}
    </delete>
    <select id="findAll" resultType="User">
        select * from user
    </select>
</mapper>
添加Mapper的扫描
在Spring Boot的入口程序上添加如下的注解,来完成VipMapper接口的扫描:
告诉MyBatis框架MapperXML文件的位置
在application.properties配置文件中进行如下配置:
mybatis.mapper-locations=classpath:mapper/*.xml测试整合MyBatis是否成功
在Spring Boot主入口程序中获取Spring上下文对象ApplicationContext,从Spring容器中获取VipMapper对象,然后调用相关方法进行测试:
package com.powernode.sb305springbootmybatis;

import com.powernode.sb305springbootmybatis.model.Vip;
import com.powernode.sb305springbootmybatis.repository.VipMapper;
import org.mybatis.spring.annotation.MapperScan;
import org.springframework.boot.SpringApplication;
import org.springframework.boot.autoconfigure.SpringBootApplication;
import org.springframework.context.ConfigurableApplicationContext;

@MapperScan(basePackages = {"com.powernode.sb305springbootmybatis.repository"})
@SpringBootApplication
public class Sb305SpringbootMybatisApplication {

    public static void main(String[] args) {
        // 获取Spring上下文
        ConfigurableApplicationContext applicationContext = SpringApplication.run(Sb305SpringbootMybatisApplication.class, args);
        // 根据id获取容器中的对象
        VipMapper vipMapper = applicationContext.getBean("vipMapper", VipMapper.class);
        Vip vip = vipMapper.selectById(1L);
        System.out.println(vip);
        // 关闭Spring上下文
        applicationContext.close();
    }

}
测试结果:

测试结果中可以看到cardNumber属性没有赋值成功,原因是:表中的字段名叫做card_number,和实体类Vip的属性名cardNumber对应不上。解决办法两个:
- 第一种方式:查询语句使用as关键字起别名,让查询结果列名和实体类的属性名对应上。

再次测试:

- 第二种方式:通过配置自动映射
在application.properties配置文件中进行如下配置:
mybatis.configuration.map-underscore-to-camel-case=truemap-underscore-to-camel-case 是一个配置项,主要用于处理数据库字段名与Java对象属性名之间的命名差异。在许多数据库中,字段名通常使用下划线(_)分隔单词,例如 first_name 或 last_name。而在Java代码中,变量名通常使用驼峰式命名法(camel case),如 firstName 和 lastName。
当使用MyBatis作为ORM框架时,默认情况下它会将SQL查询结果映射到Java对象的属性上。如果数据库中的字段名与Java对象的属性名不一致,那么就需要手动为每个字段指定相应的属性名,或者使用某种方式来自动转换这些名称。
map-underscore-to-camel-case 这个配置项的作用就是在查询结果映射到Java对象时,自动将下划线分隔的字段名转换成驼峰式命名法。这样可以减少手动映射的工作量,并提高代码的可读性和可维护性。
mapper的xml文件中的sql语句仍然使用*的方式:

测试结果如下:

Lombok库
Lombok 是一个 Java 库,它可以通过注解的方式减少 Java 代码中的样板代码。Lombok 自动为你生成构造函数、getter、setter、equals、hashCode、toString 方法等,从而避免了手动编写这些重复性的代码。这不仅减少了出错的机会,还让代码看起来更加简洁。
Lombok只是一个编译阶段的库,能够帮我们自动补充代码,在Java程序运行阶段并不起作用。(因此Lombok库并不会影响Java程序的执行效率)
Lombok 的主要注解
@Data:
- 等价于
@ToString,@EqualsAndHashCode,@Getter,@Setter,@RequiredArgsConstructor. - 用于生成:必要参数的构造方法、getter、setter、toString、equals 和 hashcode 方法。
@Getter / @Setter:
- 分别用于生成所有的 getter 和 setter 方法。
- 可以作用于整个类,也可以作用于特定的字段。
@NoArgsConstructor:
- 生成一个无参构造方法。
@AllArgsConstructor:
- 生成一个包含所有实例变量的构造器。
@RequiredArgsConstructor:
- 生成包含所有被
final修饰符修饰的实例变量的构造方法。 - 如果没有
**<font style="color:#DF2A3F;">final</font>**的实例变量,则自动生成无参数构造方法。
@ToString / @EqualsAndHashCode:
- 用于生成 toString 和 equals/hashCode 方法。
- 这两个注解都有
**<font style="color:#DF2A3F;">exclude</font>**属性,通过这个属性可以定制toString、hashCode、equals方法。
在 Maven 的 pom.xml 文件中添加 Lombok 依赖:
<dependency>
    <groupId>org.projectlombok</groupId>
    <artifactId>lombok</artifactId>
    <version>1.18.34</version>
    <scope>provided</scope>
</dependency>
Lombok的其他常用注解
@Value
该注解会给所有属性添加final,给所有属性提供getter方法,自动生成toString、hashCode、equals
通过这个注解可以创建不可变对象。
package com.powernode.lomboktest.model;

import lombok.Value;

@Value
public class Customer {
    Long id;
    String name;
    String password;
}
@Builder
GoF23种设计模式之一:建造模式
建造模式(Builder Pattern)属于创建型设计模式。GoF23种设计模式之一。
用于解决对象创建时参数过多的问题。它通过将对象的构造过程与其表示分离,使得构造过程可以逐步完成,而不是一次性提供所有参数。建造模式的主要目的是让对象的创建过程更加清晰、灵活和可控。
简而言之,建造模式用于:
- 简化构造过程:通过逐步构造对象,避免构造函数参数过多。
- 提高可读性和可维护性:让构造过程更加清晰和有序。
- 增强灵活性:允许按需配置对象的不同部分。
这样可以更方便地创建复杂对象,并且使得代码更加易于理解和维护。
建造模式的代码
建造模式代码如下:
package com.powernode.lomboktest.model;

// 建造模式
public class Person {
    // 属性
    private final String name;
    private final int age;
    private final String email;

    // 私有的全参数构造方法
    private Person(String name, int age, String email) {
        this.name = name;
        this.age = age;
        this.email = email;
    }

    public String getName() {
        return name;
    }

    public int getAge() {
        return age;
    }

    public String getEmail() {
        return email;
    }

    public static PersonBuilder builder() {
        return new PersonBuilder();
    }

    // 静态内部类
    public static class PersonBuilder {
        private String name;
        private int age;
        private String email;

        public PersonBuilder name(String name) {
            this.name = name;
            return this;
        }

        public PersonBuilder age(int age) {
            this.age = age;
            return this;
        }

        public PersonBuilder email(String email) {
            this.email = email;
            return this;
        }

        // 建造对象的核心方法
        public Person build() {
            return new Person(name, age, email);
        }
    }

    @Override
    public String toString() {
        return "Person{" + "name='" + name + '\'' + ", age=" + age + ", email='" + email + '\'' + '}';
    }

    public static void main(String[] args) {
        Person person = Person.builder()
                .name("jackson")
                .age(20)
                .email("jackson@123.com")
                .build();
        System.out.println(person);
    }
}
使用@Builder注解自动生成建造模式的代码
该注解可以直接帮助我们生成以上的代码。使用@Builder注解改造以上代码。
@Singular
当被建造的对象的属性是一个集合,这个集合属性使用@Singular注解进行标注的话,可以连续调用集合属性对应的方法完成多个元素的添加。如果没有这个注解,则无法连续调用方法完成多个元素的添加。
@Data
@Builder
// 建造模式
public class Person {
    // 属性
    private final String name;
    private final int age;
    private final String email;
    // Singular翻译为:单数。表示一条一条添加
    @Singular("addPhone")
    private final List<String> phones;

    public static void main(String[] args) {
        Person person = Person.builder()
                .name("jackson")
                .age(20)
                .email("jackson@123.com")
                .addPhone("15222020214")
                .addPhone("14875421424")
                .addPhone("16855241424")
                .build();
        System.out.println(person);
    }
}
@Slf4j
Lombok 支持多种日志框架的注解,可以根据你使用的日志框架选择合适的注解。以下是 Lombok 提供的部分日志注解及其对应的日志框架:
@Log4j:- 自动生成一个
org.apache.log4j.Logger对象。 - 适用于 Apache Log4j 1.x 版本。
- 自动生成一个
@Slf4j:- 自动生成一个
org.slf4j.Logger对象。 - 适用于 SLF4J(Simple Logging Facade for Java),这是一种日志门面,可以与多种实际的日志框架(如 Logback、Log4j 等)集成。
- 自动生成一个
@Log4j2:- 自动生成一个
org.apache.logging.log4j.Logger对象。 - 适用于 Apache Log4j 2.x 版本。
- 自动生成一个
第四章.自动配置概述(核心)
SpringBoot的两大核心
Spring Boot 框架的两大核心特性可以概括为“启动器”(Starter)和“自动配置”(Auto-configuration)。
- 启动器(Starter):
Spring Boot 提供了一系列的 Starter POMs,它们是一组预定义的依赖关系。
当你在项目中引入一个 Starter POM 时,它会自动包含所有必要的 Spring 组件以及合理的默认设置。开发者不需要手动管理复杂的依赖关系,也不需要担心版本冲突的问题,减少了配置上的出错可能。
- 自动配置(Auto-Configuration):
当添加了特定的 Starter POM 后,Spring Boot 会根据类路径上存在的 jar 包来自动配置 Bean(自动配置相关组件)(比如:SpringBoot发现类路径上存在mybatis相关的类,例如SqlSessionFactory.class,那么SpringBoot将自动配置mybatis相关的所有Bean。)。
如果开发者没有显式地提供任何与特定功能相关的配置,Spring Boot 将使用其默认配置来自动设置这些功能。当然,如果需要的话,用户也可以覆盖这些默认设置。
这两个特性结合在一起,使得使用 Spring Boot 开发应用程序变得更加简单快速,减少了大量的样板代码和重复配置的工作。让程序员专注业务逻辑的开发,在环境方面耗费最少的时间。
不加任何启动器,spring boot默认会启动spring-boot-starter里面默认提供以下的bean
org.springframework.context.annotation.internalConfigurationAnnotationProcessor
org.springframework.context.annotation.internalAutowiredAnnotationProcessor
org.springframework.context.annotation.internalCommonAnnotationProcessor
org.springframework.context.event.internalEventListenerProcessor
org.springframework.context.event.internalEventListenerFactory
springbootApplication
org.springframework.boot.autoconfigure.internalCachingMetadataReaderFactory
org.springframework.boot.autoconfigure.AutoConfigurationPackages
org.springframework.boot.autoconfigure.context.PropertyPlaceholderAutoConfiguration
propertySourcesPlaceholderConfigurer
org.springframework.boot.autoconfigure.jmx.JmxAutoConfiguration
mbeanExporter
objectNamingStrategy
mbeanServer
org.springframework.boot.context.properties.ConfigurationPropertiesBindingPostProcessor
org.springframework.boot.context.internalConfigurationPropertiesBinder
org.springframework.boot.context.properties.BoundConfigurationProperties
org.springframework.boot.context.properties.EnableConfigurationPropertiesRegistrar.methodValidationExcludeFilter
spring.jmx-org.springframework.boot.autoconfigure.jmx.JmxProperties
org.springframework.boot.autoconfigure.admin.SpringApplicationAdminJmxAutoConfiguration
springApplicationAdminRegistrar
org.springframework.boot.autoconfigure.aop.AopAutoConfiguration$ClassProxyingConfiguration
forceAutoProxyCreatorToUseClassProxying
org.springframework.boot.autoconfigure.aop.AopAutoConfiguration
org.springframework.boot.autoconfigure.availability.ApplicationAvailabilityAutoConfiguration
applicationAvailability
org.springframework.boot.autoconfigure.context.ConfigurationPropertiesAutoConfiguration
org.springframework.boot.autoconfigure.context.LifecycleAutoConfiguration
lifecycleProcessor
spring.lifecycle-org.springframework.boot.autoconfigure.context.LifecycleProperties
org.springframework.boot.autoconfigure.info.ProjectInfoAutoConfiguration
spring.info-org.springframework.boot.autoconfigure.info.ProjectInfoProperties
org.springframework.boot.autoconfigure.sql.init.SqlInitializationAutoConfiguration
spring.sql.init-org.springframework.boot.autoconfigure.sql.init.SqlInitializationProperties
org.springframework.boot.sql.init.dependency.DatabaseInitializationDependencyConfigurer$DependsOnDatabaseInitializationPostProcessor
org.springframework.boot.autoconfigure.ssl.SslAutoConfiguration
fileWatcher
sslPropertiesSslBundleRegistrar
sslBundleRegistry
spring.ssl-org.springframework.boot.autoconfigure.ssl.SslProperties
org.springframework.boot.autoconfigure.task.TaskExecutorConfigurations$ThreadPoolTaskExecutorBuilderConfiguration
threadPoolTaskExecutorBuilder
org.springframework.boot.autoconfigure.task.TaskExecutorConfigurations$SimpleAsyncTaskExecutorBuilderConfiguration
simpleAsyncTaskExecutorBuilder
org.springframework.boot.autoconfigure.task.TaskExecutorConfigurations$TaskExecutorConfiguration
applicationTaskExecutor
org.springframework.boot.autoconfigure.task.TaskExecutionAutoConfiguration
spring.task.execution-org.springframework.boot.autoconfigure.task.TaskExecutionProperties
org.springframework.boot.autoconfigure.task.TaskSchedulingConfigurations$ThreadPoolTaskSchedulerBuilderConfiguration
threadPoolTaskSchedulerBuilder
org.springframework.boot.autoconfigure.task.TaskSchedulingConfigurations$SimpleAsyncTaskSchedulerBuilderConfiguration
simpleAsyncTaskSchedulerBuilder
org.springframework.boot.autoconfigure.task.TaskSchedulingAutoConfiguration
spring.task.scheduling-org.springframework.boot.autoconfigure.task.TaskSchedulingProperties
org.springframework.aop.config.internalAutoProxyCreator
引入web启动器:
<dependency>
  <groupId>org.springframework.boot</groupId>
  <artifactId>spring-boot-starter-web</artifactId>
</dependency>可以发现,ioc容器中注册的bean总数量为160个:
org.springframework.context.annotation.internalConfigurationAnnotationProcessor
org.springframework.context.annotation.internalAutowiredAnnotationProcessor
org.springframework.context.annotation.internalCommonAnnotationProcessor
org.springframework.context.event.internalEventListenerProcessor
org.springframework.context.event.internalEventListenerFactory
testApplication
org.springframework.boot.autoconfigure.internalCachingMetadataReaderFactory
org.springframework.boot.autoconfigure.AutoConfigurationPackages
org.springframework.boot.autoconfigure.context.PropertyPlaceholderAutoConfiguration
propertySourcesPlaceholderConfigurer
org.springframework.boot.autoconfigure.ssl.SslAutoConfiguration
fileWatcher
sslPropertiesSslBundleRegistrar
sslBundleRegistry
org.springframework.boot.context.properties.ConfigurationPropertiesBindingPostProcessor
org.springframework.boot.context.internalConfigurationPropertiesBinder
org.springframework.boot.context.properties.BoundConfigurationProperties
org.springframework.boot.context.properties.EnableConfigurationPropertiesRegistrar.methodValidationExcludeFilter
spring.ssl-org.springframework.boot.autoconfigure.ssl.SslProperties
org.springframework.boot.autoconfigure.websocket.servlet.WebSocketServletAutoConfiguration$TomcatWebSocketConfiguration
websocketServletWebServerCustomizer
org.springframework.boot.autoconfigure.websocket.servlet.WebSocketServletAutoConfiguration
org.springframework.boot.autoconfigure.web.servlet.ServletWebServerFactoryConfiguration$EmbeddedTomcat
tomcatServletWebServerFactory
org.springframework.boot.autoconfigure.web.servlet.ServletWebServerFactoryAutoConfiguration
servletWebServerFactoryCustomizer
tomcatServletWebServerFactoryCustomizer
server-org.springframework.boot.autoconfigure.web.ServerProperties
webServerFactoryCustomizerBeanPostProcessor
errorPageRegistrarBeanPostProcessor
org.springframework.boot.autoconfigure.web.servlet.DispatcherServletAutoConfiguration$DispatcherServletConfiguration
dispatcherServlet
spring.mvc-org.springframework.boot.autoconfigure.web.servlet.WebMvcProperties
org.springframework.boot.autoconfigure.web.servlet.DispatcherServletAutoConfiguration$DispatcherServletRegistrationConfiguration
dispatcherServletRegistration
org.springframework.boot.autoconfigure.web.servlet.DispatcherServletAutoConfiguration
org.springframework.boot.autoconfigure.task.TaskExecutorConfigurations$ThreadPoolTaskExecutorBuilderConfiguration
threadPoolTaskExecutorBuilder
org.springframework.boot.autoconfigure.task.TaskExecutorConfigurations$TaskExecutorBuilderConfiguration
taskExecutorBuilder
org.springframework.boot.autoconfigure.task.TaskExecutorConfigurations$SimpleAsyncTaskExecutorBuilderConfiguration
simpleAsyncTaskExecutorBuilder
org.springframework.boot.autoconfigure.task.TaskExecutorConfigurations$TaskExecutorConfiguration
applicationTaskExecutor
org.springframework.boot.autoconfigure.task.TaskExecutionAutoConfiguration
spring.task.execution-org.springframework.boot.autoconfigure.task.TaskExecutionProperties
org.springframework.boot.autoconfigure.web.servlet.error.ErrorMvcAutoConfiguration$WhitelabelErrorViewConfiguration
error
beanNameViewResolver
org.springframework.boot.autoconfigure.web.servlet.error.ErrorMvcAutoConfiguration$DefaultErrorViewResolverConfiguration
conventionErrorViewResolver
spring.web-org.springframework.boot.autoconfigure.web.WebProperties
org.springframework.boot.autoconfigure.web.servlet.error.ErrorMvcAutoConfiguration
errorAttributes
basicErrorController
errorPageCustomizer
preserveErrorControllerTargetClassPostProcessor
org.springframework.boot.autoconfigure.web.servlet.WebMvcAutoConfiguration$EnableWebMvcConfiguration
welcomePageHandlerMapping
welcomePageNotAcceptableHandlerMapping
localeResolver
themeResolver
flashMapManager
mvcConversionService
mvcValidator
mvcContentNegotiationManager
requestMappingHandlerMapping
mvcPatternParser
mvcUrlPathHelper
mvcPathMatcher
viewControllerHandlerMapping
beanNameHandlerMapping
routerFunctionMapping
resourceHandlerMapping
mvcResourceUrlProvider
defaultServletHandlerMapping
requestMappingHandlerAdapter
handlerFunctionAdapter
mvcUriComponentsContributor
httpRequestHandlerAdapter
simpleControllerHandlerAdapter
handlerExceptionResolver
mvcViewResolver
mvcHandlerMappingIntrospector
viewNameTranslator
org.springframework.boot.autoconfigure.web.servlet.WebMvcAutoConfiguration$WebMvcAutoConfigurationAdapter
defaultViewResolver
viewResolver
requestContextFilter
org.springframework.boot.autoconfigure.web.servlet.WebMvcAutoConfiguration
formContentFilter
org.springframework.boot.autoconfigure.jmx.JmxAutoConfiguration
mbeanExporter
objectNamingStrategy
mbeanServer
spring.jmx-org.springframework.boot.autoconfigure.jmx.JmxProperties
org.springframework.boot.autoconfigure.admin.SpringApplicationAdminJmxAutoConfiguration
springApplicationAdminRegistrar
org.springframework.boot.autoconfigure.aop.AopAutoConfiguration$ClassProxyingConfiguration
forceAutoProxyCreatorToUseClassProxying
org.springframework.boot.autoconfigure.aop.AopAutoConfiguration
org.springframework.boot.autoconfigure.availability.ApplicationAvailabilityAutoConfiguration
applicationAvailability
org.springframework.boot.autoconfigure.jackson.JacksonAutoConfiguration$Jackson2ObjectMapperBuilderCustomizerConfiguration
standardJacksonObjectMapperBuilderCustomizer
spring.jackson-org.springframework.boot.autoconfigure.jackson.JacksonProperties
org.springframework.boot.autoconfigure.jackson.JacksonAutoConfiguration$JacksonObjectMapperBuilderConfiguration
jacksonObjectMapperBuilder
org.springframework.boot.autoconfigure.jackson.JacksonAutoConfiguration$ParameterNamesModuleConfiguration
parameterNamesModule
org.springframework.boot.autoconfigure.jackson.JacksonAutoConfiguration$JacksonObjectMapperConfiguration
jacksonObjectMapper
org.springframework.boot.autoconfigure.jackson.JacksonAutoConfiguration$JacksonMixinConfiguration
jsonMixinModuleEntries
jsonMixinModule
org.springframework.boot.autoconfigure.jackson.JacksonAutoConfiguration
jsonComponentModule
org.springframework.boot.autoconfigure.context.ConfigurationPropertiesAutoConfiguration
org.springframework.boot.autoconfigure.context.LifecycleAutoConfiguration
lifecycleProcessor
spring.lifecycle-org.springframework.boot.autoconfigure.context.LifecycleProperties
org.springframework.boot.autoconfigure.http.HttpMessageConvertersAutoConfiguration$StringHttpMessageConverterConfiguration
stringHttpMessageConverter
org.springframework.boot.autoconfigure.http.JacksonHttpMessageConvertersConfiguration$MappingJackson2HttpMessageConverterConfiguration
mappingJackson2HttpMessageConverter
org.springframework.boot.autoconfigure.http.JacksonHttpMessageConvertersConfiguration
org.springframework.boot.autoconfigure.http.HttpMessageConvertersAutoConfiguration
messageConverters
org.springframework.boot.autoconfigure.info.ProjectInfoAutoConfiguration
spring.info-org.springframework.boot.autoconfigure.info.ProjectInfoProperties
org.springframework.boot.autoconfigure.sql.init.SqlInitializationAutoConfiguration
spring.sql.init-org.springframework.boot.autoconfigure.sql.init.SqlInitializationProperties
org.springframework.boot.sql.init.dependency.DatabaseInitializationDependencyConfigurer$DependsOnDatabaseInitializationPostProcessor
org.springframework.boot.autoconfigure.task.TaskSchedulingConfigurations$ThreadPoolTaskSchedulerBuilderConfiguration
threadPoolTaskSchedulerBuilder
org.springframework.boot.autoconfigure.task.TaskSchedulingConfigurations$TaskSchedulerBuilderConfiguration
taskSchedulerBuilder
org.springframework.boot.autoconfigure.task.TaskSchedulingConfigurations$SimpleAsyncTaskSchedulerBuilderConfiguration
simpleAsyncTaskSchedulerBuilder
org.springframework.boot.autoconfigure.task.TaskSchedulingAutoConfiguration
spring.task.scheduling-org.springframework.boot.autoconfigure.task.TaskSchedulingProperties
org.springframework.boot.autoconfigure.web.client.RestClientAutoConfiguration
httpMessageConvertersRestClientCustomizer
restClientSsl
restClientBuilderConfigurer
restClientBuilder
org.springframework.boot.autoconfigure.web.client.RestTemplateAutoConfiguration
restTemplateBuilderConfigurer
restTemplateBuilder
org.springframework.boot.autoconfigure.web.embedded.EmbeddedWebServerFactoryCustomizerAutoConfiguration$TomcatWebServerFactoryCustomizerConfiguration
tomcatWebServerFactoryCustomizer
org.springframework.boot.autoconfigure.web.embedded.EmbeddedWebServerFactoryCustomizerAutoConfiguration
org.springframework.boot.autoconfigure.web.servlet.HttpEncodingAutoConfiguration
characterEncodingFilter
localeCharsetMappingsCustomizer
org.springframework.boot.autoconfigure.web.servlet.MultipartAutoConfiguration
multipartConfigElement
multipartResolver
spring.servlet.multipart-org.springframework.boot.autoconfigure.web.servlet.MultipartProperties
org.springframework.aop.config.internalAutoProxyCreator也就是说,引入了web启动器后,ioc容器中增加了101个bean对象(加入了101个组件)。这101个bean对象都是为web开发而准备的,例如我们常见的:
- dispatcherServlet:DispatcherServlet 是 Spring MVC 的前端控制器,负责接收所有的 HTTP 请求,并将请求分发给适当的处理器(Controller)
- viewResolver:ViewResolver 是 Spring MVC 中用于将逻辑视图名称解析为实际视图对象的组件。它的主要作用是根据控制器返回的视图名称,找到对应的视图实现(如 JSP、Thymeleaf、Freemarker 等),并返回给 DispatcherServlet 用于渲染视图。
- characterEncodingFilter:字符集过滤器组件,解决请求和响应的乱码问题。
- mappingJackson2HttpMessageConverter:负责处理消息转换的组件。它可以将json字符串转换成java对象,也可以将java对象转换为json字符串。
- ......
每一个组件都有它特定的功能。
没有使用SpringBoot之前,以上的很多组件都是需要手动配置的。
默认配置
springboot为功能的实现提供了非常多的默认配置.
例如:tomcat服务器端口号在没有配置的情况下,默认是8080
当然,也可以在application.properties文件中进行重新配置:
server.port=8081这些配置最终都会通过@ConfigurationProperties(prefix="")注解绑定到对应的bean的属性上。这个Bean我们一般称为属性类。例如:
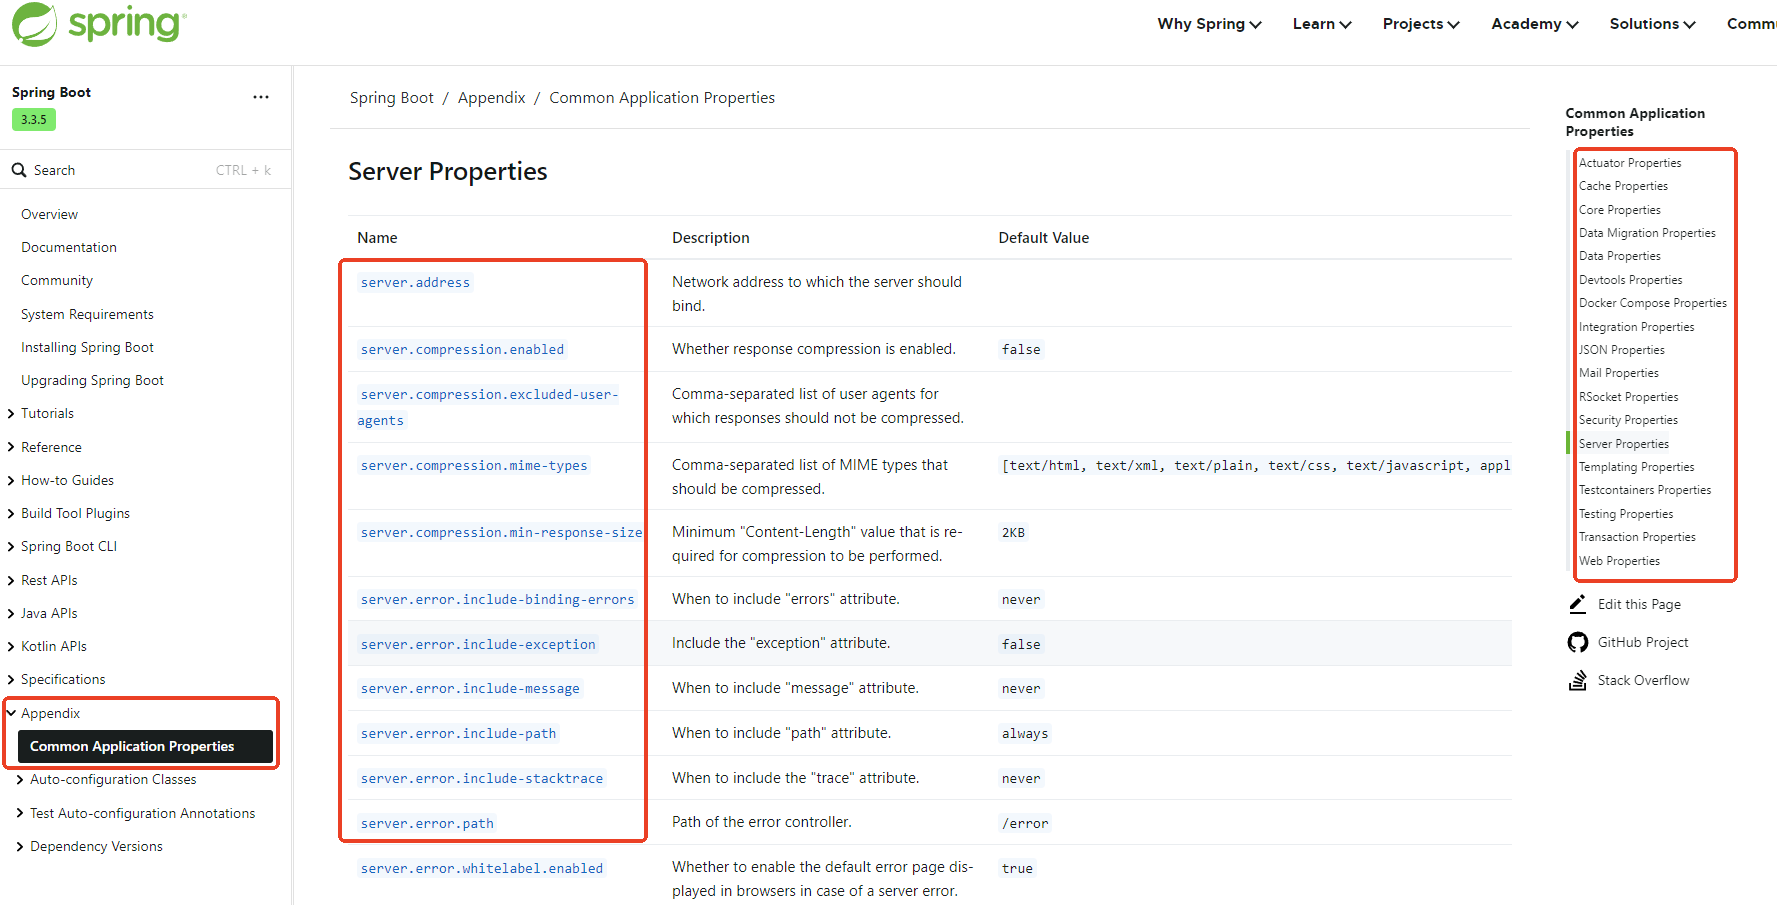
ServerProperties:服务器属性类,专门负责配置服务器相关信息。
@ConfigurationProperties(prefix = "server", ignoreUnknownFields = true)
public class ServerProperties {}SpringBoot官方文档当中也有指导,告诉你都有哪些属性类,告诉你在application.properties中都可以配置哪些东西。默认值都是什么:
条件注解
如何做到按需加载的,依靠SpringBoot框架中的条件注解来实现的。
Spring Boot框架中的@ConditionalOnXxx系列注解属于条件注解(Conditional Annotations),它们用于基于某些条件来决定是否应该创建一个或一组Bean。这些注解通常用在自动配置类上,以确保只有在特定条件满足时才会应用相应的配置。
这里是一些常见的@ConditionalOnXxx注解及其作用:
- @ConditionalOnClass:当指定的类存在时,才创建Bean。
- @ConditionalOnMissingClass:当指定的类不存在时,才创建Bean。
- @ConditionalOnBean:当容器中存在指定的Bean时,才创建Bean。
- @ConditionalOnMissingBean:当容器中不存在指定的Bean时,才创建Bean。
- @ConditionalOnProperty:当配置文件中存在指定的属性时,才创建Bean。也可以设置属性值需要匹配的值。
- @ConditionalOnResource:当指定的资源存在时,才创建Bean。
- @ConditionalOnWebApplication:当应用程序是Web应用时,才创建Bean。
- @ConditionalOnNotWebApplication:当应用程序不是Web应用时,才创建Bean。
使用这些注解可以帮助开发者根据不同的运行环境或配置来灵活地控制Bean的创建,从而实现更智能、更自动化的配置过程。这对于构建可插拔的模块化系统特别有用,因为可以根据实际需求选择性地启用或禁用某些功能。
自动配置按需加载
SpringBoot提供了非常多的自动配置类,有的是web相关的自动配置,有的是mail相关的自动配置。但是这些自动配置并不是全部生效,它是按需加载的。导入了哪个启动器,则该启动器对应的自动配置类才会被加载。
这些自动配置类在哪里?
任何启动器都会关联引入这样一个启动器:spring-boot-starter,它是springboot框架最核心的启动器。
spring-boot-starter又关联引入了spring-boot-autoconfigure。所有的自动配置类都在这里。
自动配置实现原理
在程序没有开始执行之前都导入了哪些依赖
在程序没有开始运行之前,我们先来分析一下,当导入web启动器之后,底层都一连串的导入了哪些依赖!
- 从这里开始:导入了
spring-boot-starter-web【web启动器】 然后关联导入了
spring-boot-starter、spring-boot-starter-json、spring-boot-starter-tomcat、spring-web、spring-webmvc- 注意:
spring-boot-starter是springboot核心启动器,任何启动器在导入时,都会关联导入springboot核心启动器。
- 注意:
核心启动器导入之后,关联导入了一个jar包:
spring-boot-autoconfigure。- 注意:这个jar包中存放的是springboot框架官方支持的自动配置类。如下图:
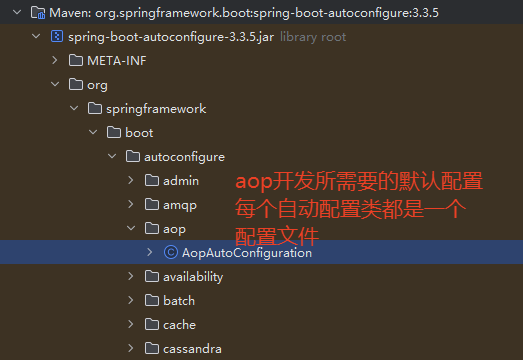
2. 官方支持的自动配置类有多少个呢,可以通过下图位置查看:

得知springboot3.3.5这个版本共152个自动配置类。自动配置类的命名规则是XxxxAutoConfiguration。
提示:哪个自动配置类生效,就代表哪个配置文件生效,那么对应的技术就完成了整合,就可以进行对应技术的开发。
从main方法开始执行之后都发生了什么
以上分析的是在项目结构上已经完成了相关依赖的导入,这些自动配置了导入到了项目当中,那么在运行时哪些自动配置类会被加载?哪些自动配置类会生效呢?我们接下来进行程序运行阶段的分析:
- 程序从main方法进入执行,主入口类上使用
@SpringBootApplication进行了标注。 @SpringBootApplication注解是复合注解,代表以下三个注解的功能:@SpringBootConfiguration:它被@Configuration标注,说明主入口类就是一个配置类,此时该配置开始加载。@ComponentScan:默认扫描的是主入口所在包以及子包。因此spring-boot-autoconfigure包是扫描不到的,按说XxxAutoConfiguration自动配置类是无法加载的!!!那么这些自动配置类又是如何加载和生效的呢?@EnableAutoConfiguration:自动配置类的加载和生效全靠它了。该注解被翻译为:启用自动配置。
@EnableAutoConfiguration被@Import(AutoConfigurationImportSelector.class)标注@Import(AutoConfigurationImportSelector.class)的作用是:将AutoConfigurationImportSelector作为一个Bean加载到IoC容器中。- 这个Bean的作用是:负责收集和选择所有符合条件的自动配置类。
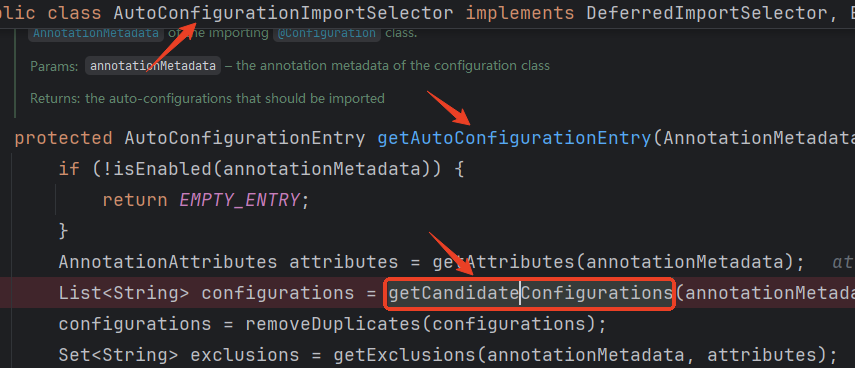
- 添加断点,跟踪
AutoConfigurationImportSelector源码:
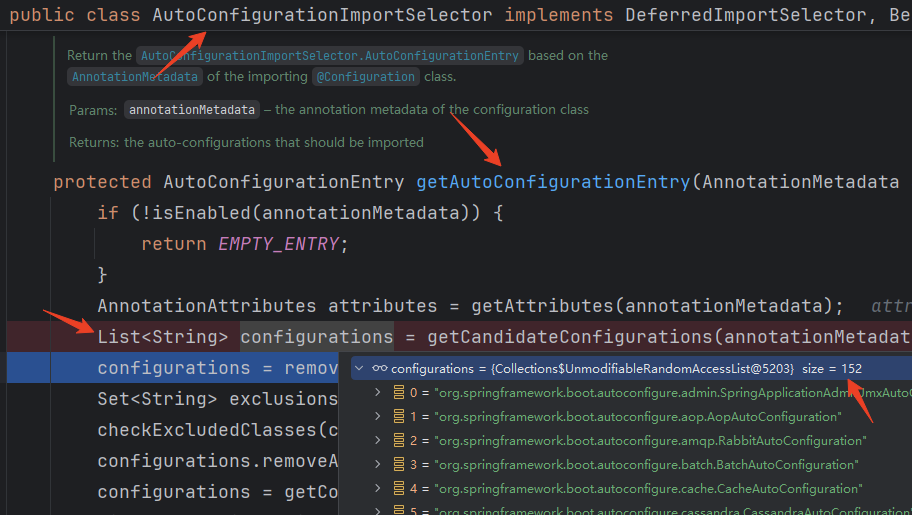
通过跟踪得知,这152个自动配置类的类名都会被加载到IoC容器中。注意:加载了152,并不是152个全部生效。
- 这
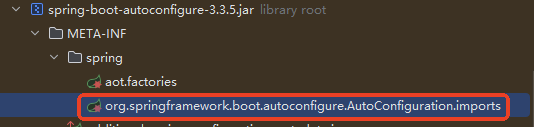
152个自动配置类底层是怎么查找的?


通过以上源码跟踪,得知,是从下图位置加载的:
- 最终哪些自动配置类生效了?
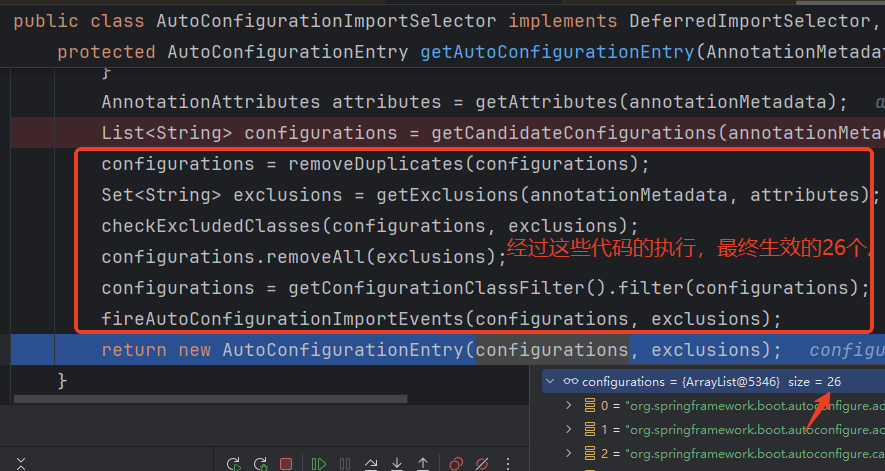
最先获取到152个,经过上图的一层一层的过滤(条件注解),最终筛选了**<font style="color:#DF2A3F;">26</font>**个自动配置类,为什么这么少,因为你只引入了**<font style="color:#DF2A3F;">web starter</font>**。这26个配置就是做web开发需要的最少配置。
具体怎么排除的,请看以下解释:
- configurations = removeDuplicates(configurations);
去重:移除 configurations 列表中的重复项,确保每个配置类只出现一次。
- Set
exclusions = getExclusions(annotationMetadata, attributes);
获取排除列表:从注解元数据和属性中获取需要排除的配置类名称集合。因为@EnableAutoConfiguration注解还能这么用:@EnableAutoConfiguration(exclude = {排除列表}, excludeName = {排除列表})
- checkExcludedClasses(configurations, exclusions);
检查排除:验证 configurations 中是否有被排除的类,如果有,可能会抛出异常或记录警告。
- configurations.removeAll(exclusions);
移除排除项:从 configurations 列表中移除所有在 exclusions 集合中的配置类。
- configurations = getConfigurationClassFilter().filter(configurations);
过滤配置类:使用 ConfigurationClassFilter 对 configurations 进行进一步过滤。这一行通过条件注解进行判断,例如 @ConditionalOnClass、@ConditionalOnMissingBean 等。
- fireAutoConfigurationImportEvents(configurations, exclusions);
触发事件:触发自动配置导入事件,通知其他组件或监听器关于最终确定的配置类和排除的类。
总结自动配置原理
运行环境准备阶段
- 引入web启动器
- 最终传递引入了自动配置的jar包
- 自动配置的jar包中有152个自动配置类,到此运行环境准备完毕。
运行阶段
- @EnableAutoConfiguration 启用自动配置,将152个自动配置类全部加载到IoC容器中,然后根据开发场景筛选出必须的自动配置类。
- 自动配置类加载了一堆组件。
- 每个组件需要的数据来自属性类。
- 属性类又和配置文件绑定在一起。
- 因此,最终一句话:导入启动器,修改配置文件,就可以完成对应功能的开发。


